
Last updated November 15, 2026
 Wrought iron
 Wood & steel frame
 Farm & ranch
 Sliding driveway gates
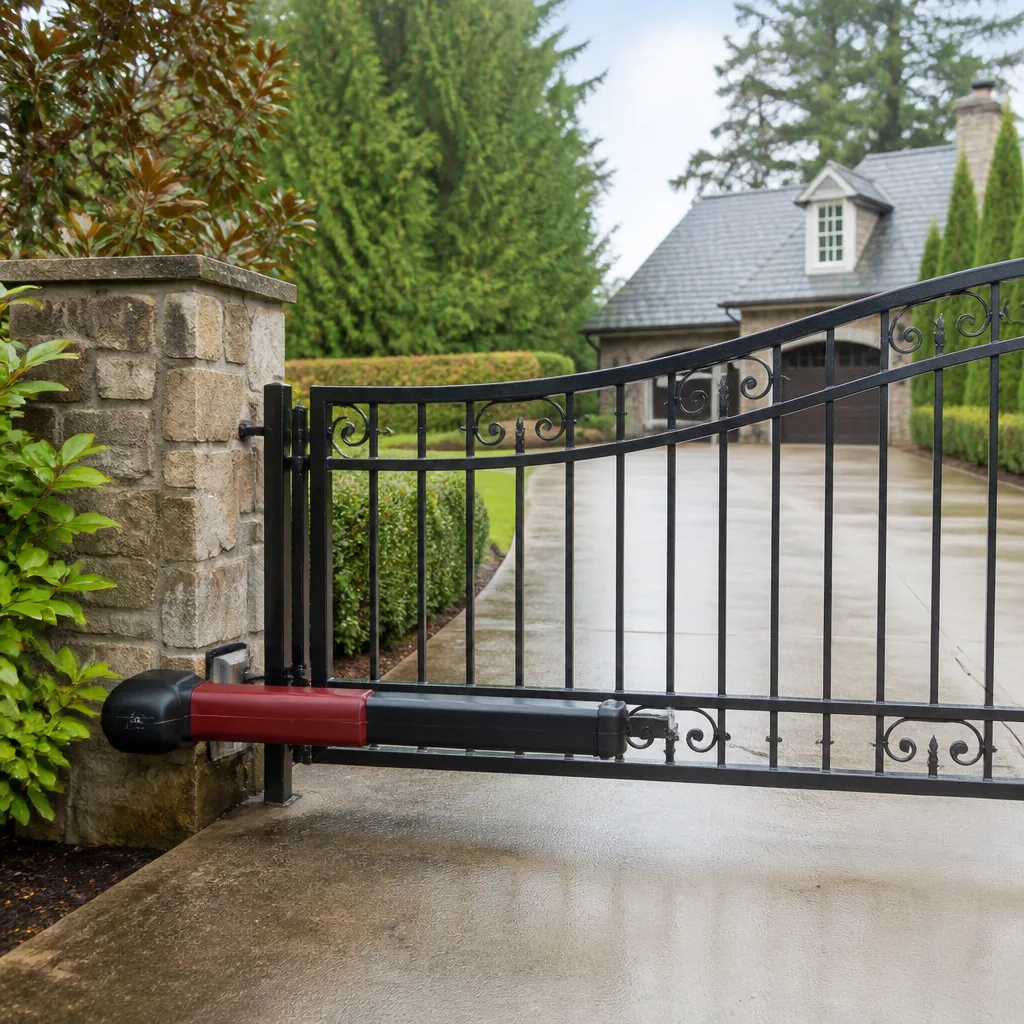 LiftMaster operators
Free on-site gate assessment - hinges, posts, and your LiftMaster or Nice gate operator checked before anything is quoted
The assessment is free and the quote is the invoice.
Get your free estimateGate Repair Troubleshooting in Santa Maria: Common Problems and How to Fix Them
The symptom your gate is showing right now – slow movement, refusal to close, grinding at the hinge – is a diagnostic clue, not random bad luck. Nine out of ten gate failures fall into fewer than a dozen failure patterns, and once you know which pattern you’re looking at, the repair stops being a mystery. Most people assume a gate that won’t move needs a new motor, and that’s rarely the first place we look. This guide maps the symptoms you can see and hear to the mechanical and electrical causes behind them, so you can either handle the simple stuff yourself or walk into a service call knowing exactly what’s wrong. It’s built from what we see on gates across Santa Maria.
Quick Answer
Most automatic gate problems come down to one of a handful of causes: a misaligned or dirty safety sensor, a limit switch that’s drifted out of position, a failing battery in the remote or control board backup, worn hinge hardware, or a motor that’s struggling under a gate that’s no longer swinging or sliding freely. The trick is matching the symptom to the cause before you touch anything. If the gate drags, sparks, or slams instead of slowing, stop using it and call a technician.
Styles & brands we work with
- Wrought iron
- Wood & steel frame
- Farm & ranch
- Sliding driveway gates
- LiftMaster operators
Table of Contents
- How Do I Match the Symptom to the Actual Cause?
- Why Won’t My Gate Open At All?
- Why Won’t My Gate Close?
- Why Does My Gate Open Partway and Then Stop?
- What Is That Grinding or Squealing Noise?
- Why Does My Remote Only Work Up Close?
- How Does Santa Maria’s Climate Affect Gate Hardware?
- Limit Switch or Motor: How Do You Tell Them Apart Without Tools?
- What Can You Safely Check Yourself?
- When Should You Stop Operating the Gate Immediately?
How Do I Match the Symptom to the Actual Cause?
Start here. The gate is telling you what’s wrong if you know how to listen. A gate that fails in the same spot every time has a positional problem – a limit switch, a track obstruction, or a physical bind. A gate that fails at random has a control or power problem – a loose connection, a dying battery, or a failing control board. And a gate that’s just gotten progressively worse over weeks has a wear problem: hinges, rollers, or a motor working harder than it should.
Here’s the symptom-to-cause map we work from, and it holds for Viking, Ghost Controls, Elite, and DoorKing operators just as well as the entry-level units:
- Won’t open or close at all: power supply, control board fuse, safety loop or photo-eye fault, or a motor that’s thermally shut down.
- Opens partway and reverses: limit switch out of adjustment, obstruction in the path of the safety sensor, or a bind in the hinge or track.
- Grinding or squealing: worn hinge bushings, dry pivot points, a slipping chain or drive gear, or debris in the track.
- Remote works close but not far: weak remote battery, antenna damaged or disconnected, or frequency interference from nearby equipment.
- Gate slams instead of slowing at the end: failed soft-stop or deceleration setting on the control board, or a motor nearing the end of its service life.
- Random stops with no pattern: loose wiring at the control board, moisture in a junction box, or a failing battery in the backup system.
Match what you’re seeing to the list, and you’ve done most of the diagnostic work. The sections below dig into each pattern in more detail. If your gate has stopped entirely and you need eyes on it, our gate repair service covers the whole range of these failures.
Why Won’t My Gate Open At All?
A gate that’s completely dead is almost always a power or control problem before it’s ever a motor problem. The motor is the most expensive part in the system, and it’s the last thing we suspect when a gate won’t open. Check these in order:
- Confirm the operator has power. Look for a display, LED, or audible click when you press the remote or keypad. No sign of life means the problem is upstream – a tripped breaker, a blown fuse, or a failed transformer.
- Check the control board indicator lights. If the board is powered but the gate won’t move, an LED will usually tell you whether the board is receiving a command and whether a safety input is holding it in a stop state.
- Test the safety devices. A blocked or misaligned photo-eye or a safety loop picking up metal nearby will stop a gate from opening the same way it stops one from closing.
- Try the manual release. Every automatic gate has a manual release key. If the gate moves freely by hand once released, the mechanical side is fine and the problem is electrical.
- Look for a thermal overload. Some operators shut the motor down after repeated cycles and need time to reset. If the gate worked, stopped, and then worked again later, that’s your answer.
If you’ve checked power and the safety devices and the gate still won’t budge, the control board or the motor is the likely culprit. That’s the point where electric gate repair becomes the call, because diagnosing a control board by sight alone isn’t realistic without a meter and the wiring diagram for your specific operator. We work on the major residential and commercial brands, so the diagnosis is usually fast.
Why Won’t My Gate Close?
A gate that opens fine but refuses to close is almost always a safety device doing its job. This is the single most common “repair” call we get that turns out not to be a repair at all. The system thinks something is in the way, or thinks the gate hasn’t fully opened, and it holds the gate open on purpose.
Run through this checklist before you assume the operator is failing:
- Photo-eyes or safety beams: the lenses collect dust, spiderwebs, and garden debris. Wipe them clean on both sides of the gate path and see if the gate closes.
- Misalignment: even a small knock to one photo-eye housing breaks the beam alignment. Look for a bracket that’s been bumped or shifted.
- Safety loops: if your system uses an in-ground loop detector, a nearby metal object like a parked car or a stray piece of rebar can trigger it. Move metal well clear of the loop area and retry.
- Limit switch position: if the operator doesn’t register the gate as fully open, it won’t start a closing cycle. That’s a limit switch adjustment, covered below.
- Sun reflection: in strong afternoon light, a direct sun angle into a photo-eye receiver can read as an obstruction. If the gate closes at dusk but not mid-afternoon, that’s the pattern.
If you’ve cleaned the eyes, confirmed alignment, and cleared the loop area, and the gate still won’t close, one of the safety devices has failed outright. That’s a common failure on any operator, whether it’s a Mighty Mule-style residential unit or a commercial DoorKing system. Solving it means replacing the failed device, not the operator.
Why Does My Gate Open Partway and Then Stop?
A gate that opens partway and stops is showing you a positional fault. The two most common causes are a limit switch that’s out of adjustment and a mechanical bind that the operator can’t push through. Here’s how to tell them apart:
- If the gate stops at the same point every time and the motor runs normally up to that point: the limit switch is the likely cause. The switch is telling the operator “you’ve reached the end of travel” too early.
- If the gate slows, strains, or makes noise as it approaches the stopping point: a mechanical bind is the likely cause. Look for a hinge that’s seized, debris in the track of a sliding gate, or a wheel out of alignment.
- If the gate stops at random points: control board or wiring fault, not a limit switch. The difference between “consistent stop point” and “random stop point” is the difference between a positional fix and an electrical fix.
A limit switch problem is discovered by watching the gate and listening for whether the motor sounds like it’s being asked to push through resistance or being told it’s done. A motor problem sounds like effort. A limit problem sounds like a clean stop. You don’t need tools to hear the difference once you know what to listen for. That single distinction is what separates a 20-minute adjustment from a motor replacement.
What Is That Grinding or Squealing Noise?
Noise on a gate is friction looking for attention. Left alone, friction turns into wear, wear turns into a bind, and a bind is what finishes off a motor. A grinding gate is going to become a gate that won’t move, and the repair bill grows every week it’s ignored.
Common noise sources in order of how often we see them:
- Dry hinge pivot points: a squeal that changes pitch through the gate’s travel usually means a dry pivot. Lubrication on the pivot can quiet it, but if it’s been dry a long time, the bushing may already be worn.
- Worn hinge bushings: a clunk or rattle at the hinge means metal-to-metal play. This needs hardware replacement, not just grease.
- Chain or track debris on sliding gates: a grinding noise on a slide gate is often debris in the track, a bent rail, or a worn roller. Slide gates are the most common cause of this complaint on commercial properties.
- Drive gear or motor bearing wear: a constant grind that comes from inside the operator housing and doesn’t change with gate position. That noise is the operator, not the gate.
If the noise is coming from the operator housing, the gate keeps running, and you want to keep it that way, that’s the point to get it looked at. Running a worn drive gear turns a gear replacement into a motor replacement. For a residential swing gate, an early diagnosis on a Ghost Controls or Elite operator is usually a straightforward fix. For commercial access at a property in Santa Maria, a grinding DoorKing actuator is worth scheduling quickly before it locks the gate in the open position.
Why Does My Remote Only Work Up Close?
A remote that works from three feet but not thirty is a range problem, and range problems are almost never the receiver. The causes stack up in a predictable order:
- Remote battery: the first and most common cause. A weak battery transmits a weaker signal. Swap the battery and test before anything else.
- Damaged or disconnected antenna: a wire has come loose, a stub antenna has been bent, or an external antenna has lost its connection. This is a very common cause of short range on the receiving side.
- Antenna positioning: if the receiver’s antenna is inside a metal housing, buried next to a metal fence post, or aimed away from the driveway, range drops hard. Moving the antenna even a few inches can double the range.
- Frequency interference: nearby equipment can interfere with the remote’s signal. Some wireless devices and older cordless phones share frequency bands with gate remotes.
- Remote out of sync: after a battery change or a control board replacement, a remote may need to be re-paired. That’s a programming step, not a hardware repair.
If you’ve replaced the battery and re-paired the remote and the range is still short, the antenna or receiver is the likely culprit. Multi-button remotes, phone app controls, and keypads all use the same receiver on your operator, so if the keypad works fine but the remote doesn’t, that points to the remote itself rather than the receiver.
How Does Santa Maria’s Climate Affect Gate Hardware?
Santa Maria sits in a climate that’s kind to some gate components and hard on others. Mild winters mean we don’t see the freeze-related failures that inland areas get, and we don’t see the extreme heat expansion that splits gate frames in hotter valleys. What we do see is steady year-round wear accelerated by moisture, dust, and daily use on gates that run several times an hour.
The components that take the beating here, in order:
- Hinge pivot points and fasteners: moisture in the pivot over months and years breaks down the lubricating film. A gate that runs often gets less time to dry out between cycles, and the wear accelerates.
- Control boards in outdoor housings: temperature swings between cool nights and warm days condense moisture inside an operator housing that isn’t well-sealed. A control board with condensation will fail in ways that look like a motor problem – intermittent stops, phantom safety trips, erratic behavior.
- Photo-eye lenses and safety device housings: the fine dust that comes with local agriculture and wind settles into photo-eye lenses and safety sensor gaps. A lens that looks clean in the shade can be occluded enough to trip the safety circuit.
- Ground-level components: safety loops and the low parts of a slide gate track collect soil and moisture, and that’s where we see the most premature wear.
For property managers in Santa Maria, an annual walk-around on a multi-gate property is money well spent. Lubrication on hinges, cleaning on photo-eyes, and a look inside the operator housing for condensation or insect intrusion prevent a lot of the calls we get. Managing the environment around the operator is worth more than any single adjustment.
Limit Switch or Motor: How Do You Tell Them Apart Without Tools?
You can separate a limit switch problem from a motor problem by listening and watching. Listen to how the motor sounds as it reaches the failure point. Watch whether the failure point moves. A limit switch problem and a motor problem feel different, and the difference is discoverable at the gate.
Run this test:
- Cycle the gate and watch where it stops. Note the exact position where it fails.
- Cycle it again. If it stops in exactly the same place, you’re looking at a positional problem – a limit switch, an obstruction, or a mechanical bind.
- Listen to the motor as it approaches the stop. A motor under load sounds like effort: it strains, changes pitch, and often gets louder just before it stops. A limit switch cutting power sounds clean: the gate stops with the motor still running normally, then the motor shuts off.
- Try the manual release. With the gate in manual, push it through the failure point by hand. If it binds, the problem is mechanical. If it moves freely, the problem is a limit switch or control setting.
- Reverse the gate direction. If the gate won’t close where it wouldn’t open, you’ve confirmed the limit switch is the issue. If it fails at a different point in the other direction, it’s more likely a control or mechanical issue.
A clean stop at a consistent point is a limit switch adjustment. A strained stop is a motor under load. That distinction is worth the four minutes it takes to run the test, because it saves a lot of frustration when you talk to a technician. If you’ve run the test and you’re still not sure, the answer will be obvious to anyone who works on your brand. That’s why we work on your brand rather than applying a generic fix – the limit system on a Viking operator behaves differently than the one on a Mighty Mule, and knowing which one you have matters.
What Can You Safely Check Yourself?
The safe checks are the ones that don’t put your hands near moving mechanism, wiring, or the operator’s high-torque components. Gate operators store energy and can move with force when called. What you do yourself should stop well short of opening a housing, adjusting a motor, or touching the wiring.
Safe for most homeowners:
- Cleaning photo-eye lenses. Wipe both sides with a soft cloth. Safe, cheap, and frequently the whole fix.
- Replacing a remote battery. Straightforward, and it resolves a surprising percentage of “my remote doesn’t work” calls.
- Clearing dirt and debris from the gate path and track. A leaf, a rock, or a chunk of soil in the path of a slide gate will trip the safety every time.
- Testing the manual release. Learning how to release your gate manually is worth doing before you need it. It’s the single most useful thing you can know about your gate.
- Visual inspection of the antenna wire. Confirming the antenna is connected and standing away from metal is safe and often fixes range problems.
Not safe to attempt yourself:
- Opening the operator housing. Live wiring, capacitors that hold a charge, and exposed moving parts. Even with the power off, the internal components aren’t designed for homeowner service.
- Adjusting limit switches inside the operator. Some operators let you make minor adjustments from outside; internal limits are a technician task.
- Working on safety loops, wiring, or control boards. Intermittent failures here are diagnosed by measurement, not by guesswork, and any wiring work needs to be done correctly the first time.
- Replacing a motor or drive gear. Beyond the safety issue, an incorrect install causes secondary damage fast.
If you’re not sure whether a task is on the safe side, treat it as a technician job. The gate repair and installation work we handle starts with a full diagnostic on the whole system, so you’re not guessing at what’s safe.
When Should You Stop Operating the Gate Immediately?
Some gate symptoms call for a shutdown, not a repair appointment. If you see any of the following, stop using the automatic function and switch to the manual release until a technician has looked at the system:
- Dragging: the gate drags on the ground, sags at the outer end, or needs to be pushed to move through part of its travel. A dragging gate overworks the motor and can cause a full mechanical failure.
- Sparking or a burning smell: any sign of electrical arcing at the operator, at the control board, or at a junction box. Cut power to the operator at the breaker and call us.
- Slamming instead of slowing: a gate that hits the end of travel at full speed rather than decelerating has lost its soft-stop function. Continued operation risks damage to the gate frame, the operator, and anything in the gate’s path.
- Safety devices that fail a test: if the gate closes on an obstruction rather than reversing, stop using the automatic function immediately. That’s a safety failure, not a convenience issue.
- Structural movement: a gate post that’s leaning or a hinge that has torn from the frame. That’s a structural repair before it’s a gate repair.
If you’re not sure whether your gate is in the red-flag category, that’s a sign to shut it off and call. Moving a gate to manual operation is the safest step until a technician can look at it. Getting a technician out quickly beats running a failing gate and adding a motor to the repair list.
Common Mistakes to Avoid
- Assuming the motor is dead when the gate won’t move. A dead motor is far less common than a dead safety device or a tripped breaker. Confirm power and safety devices before pricing a motor.
- Greasing a hinge that’s already worn out. Lubrication helps a hinge that’s dirty. It doesn’t fix a hinge whose bushing has worn through. If the gate squealed for months before it started to wobble, the hinge is a replacement, not a lubrication job.
- Bypassing a safety device to make the gate close. People do it to get the gate working for a day and then never put it back. A gate that closes on a car or a person is a serious liability, and on a property in Santa Maria that’s a risk worth avoiding under any circumstances.
- Adding a second remote when the first one fails. If one remote works and one doesn’t with fresh batteries, the problem is the remote, not the receiver. Buying another remote to work around a dying receiver wastes money.
- Relying on a general handyman for an operator repair. Gate systems are their own trade. A handyman who fixes the gate hardware may not be able to diagnose a Viking control board or a DoorKing loop detector, and the second visit eats the first one’s savings.
- Putting off a grinding noise. Grinding is the cheapest stage of a repair. The longer you defer it, the more likely the same problem ends up as a motor replacement.
- Skipping the manual release test. Every gate has one. If you’ve never tested yours, you don’t have a plan for the day the gate stops working with a car on the wrong side of it.
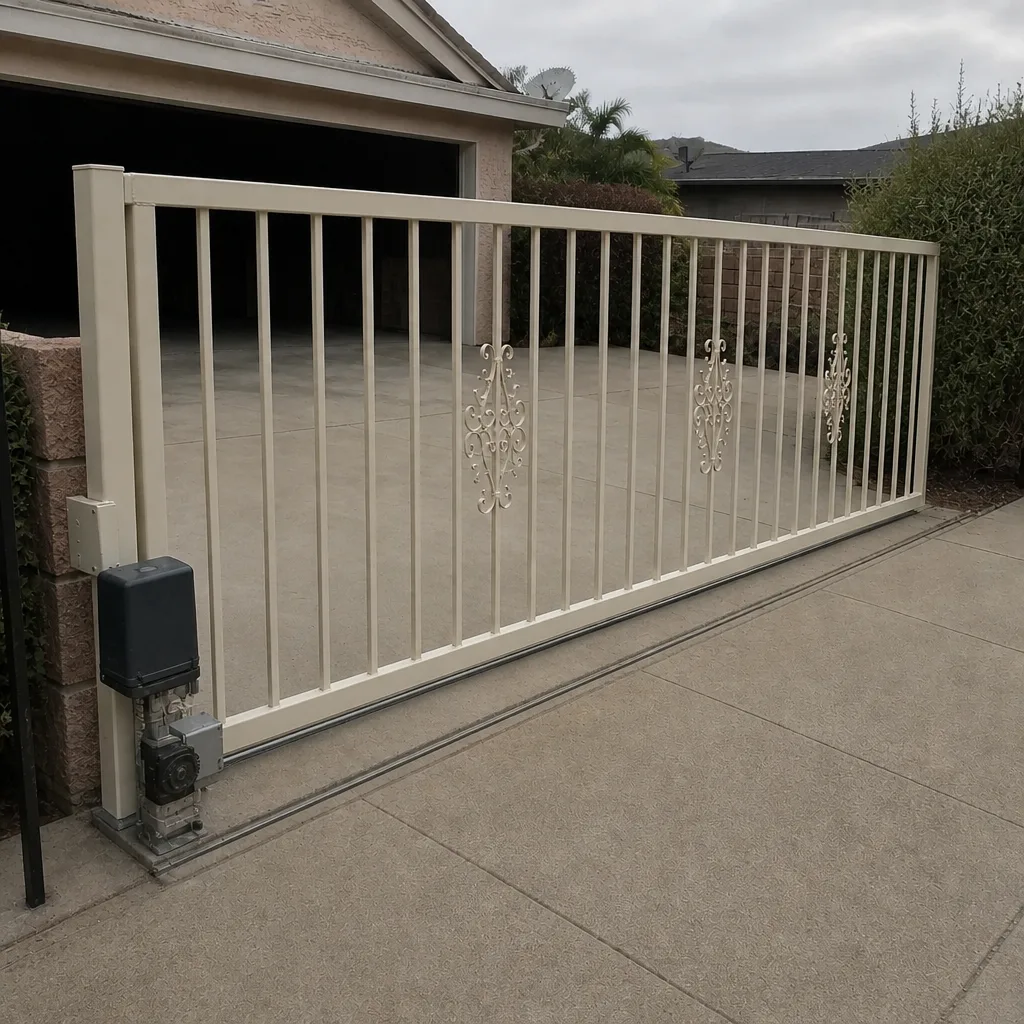
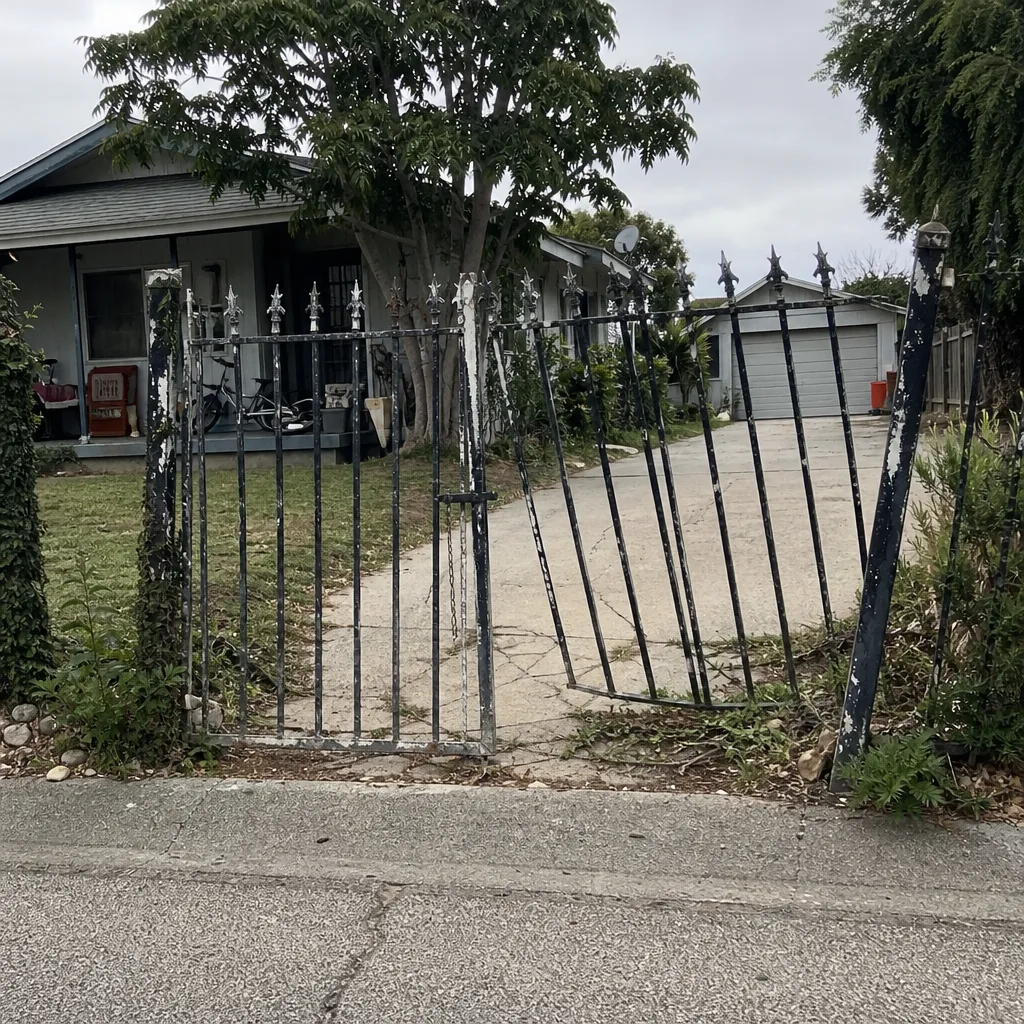
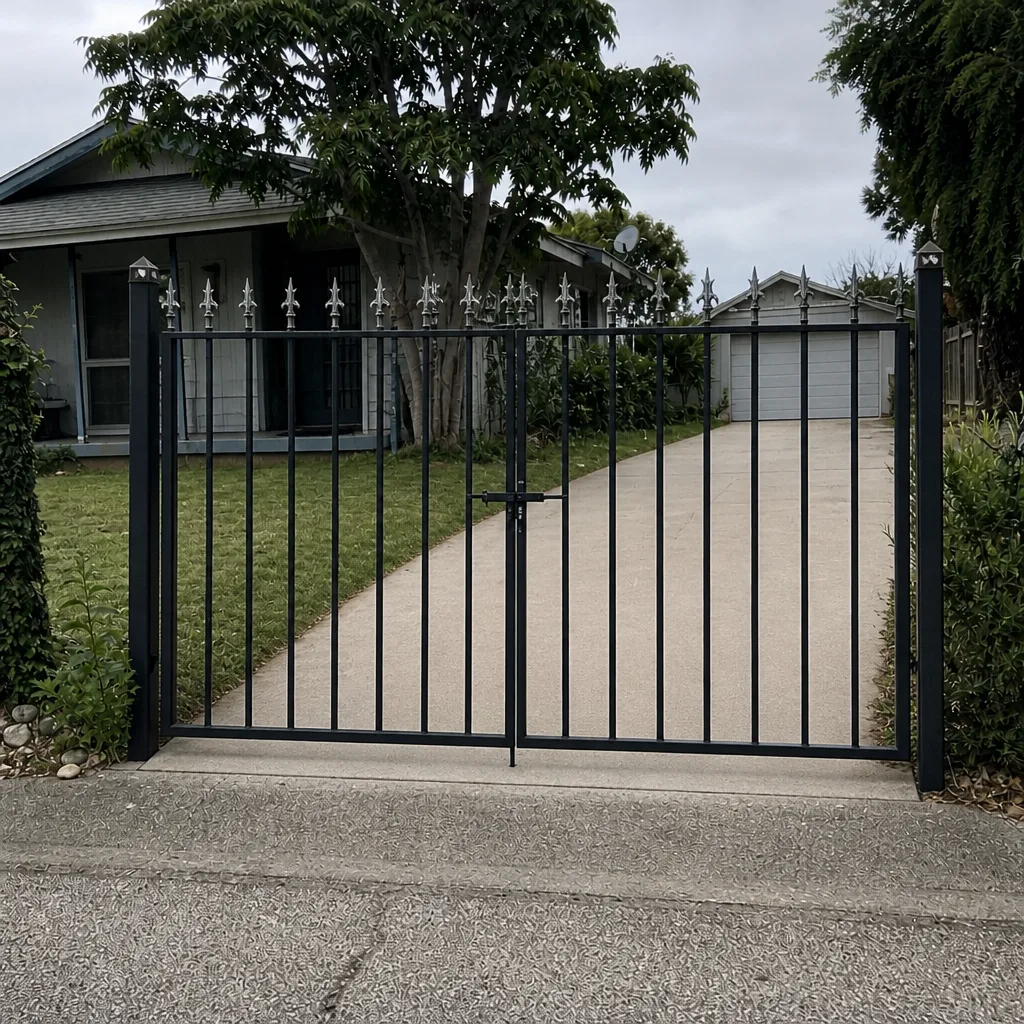
See the difference
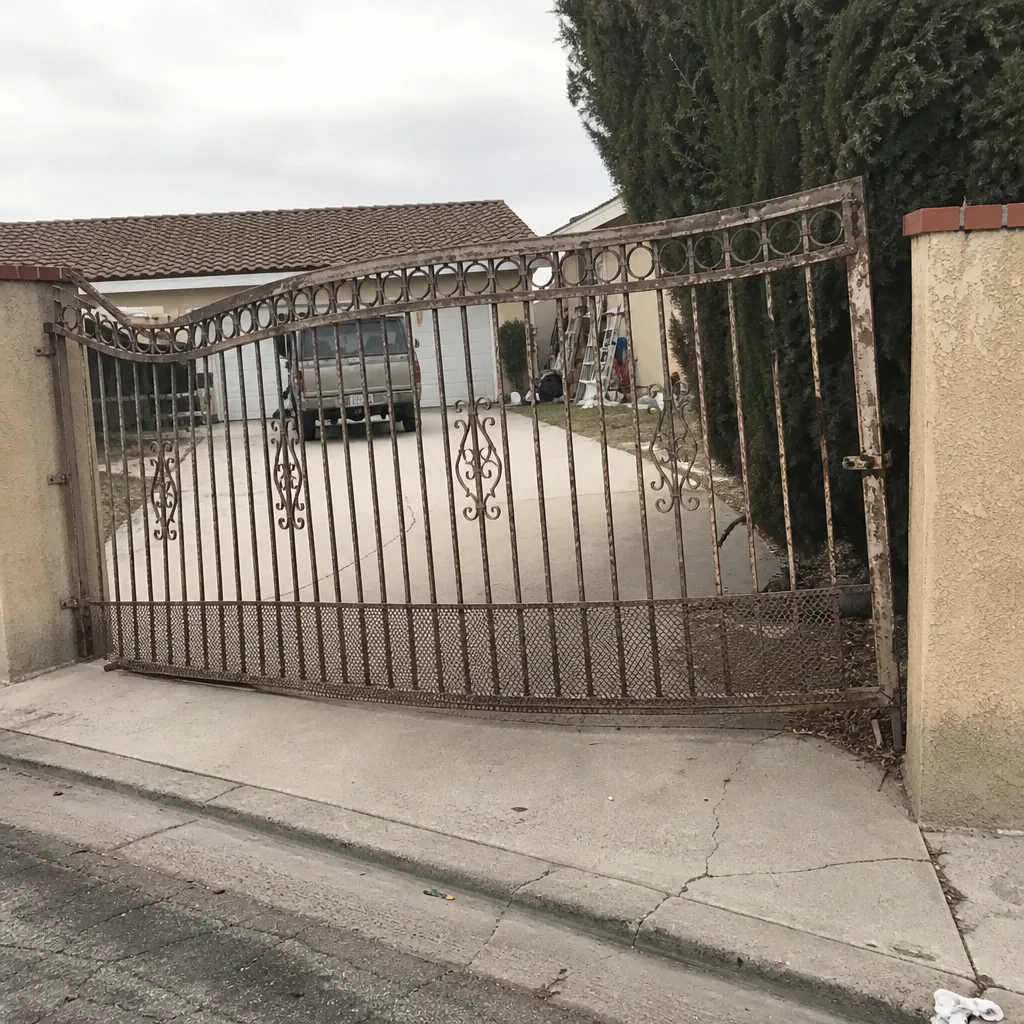 Before
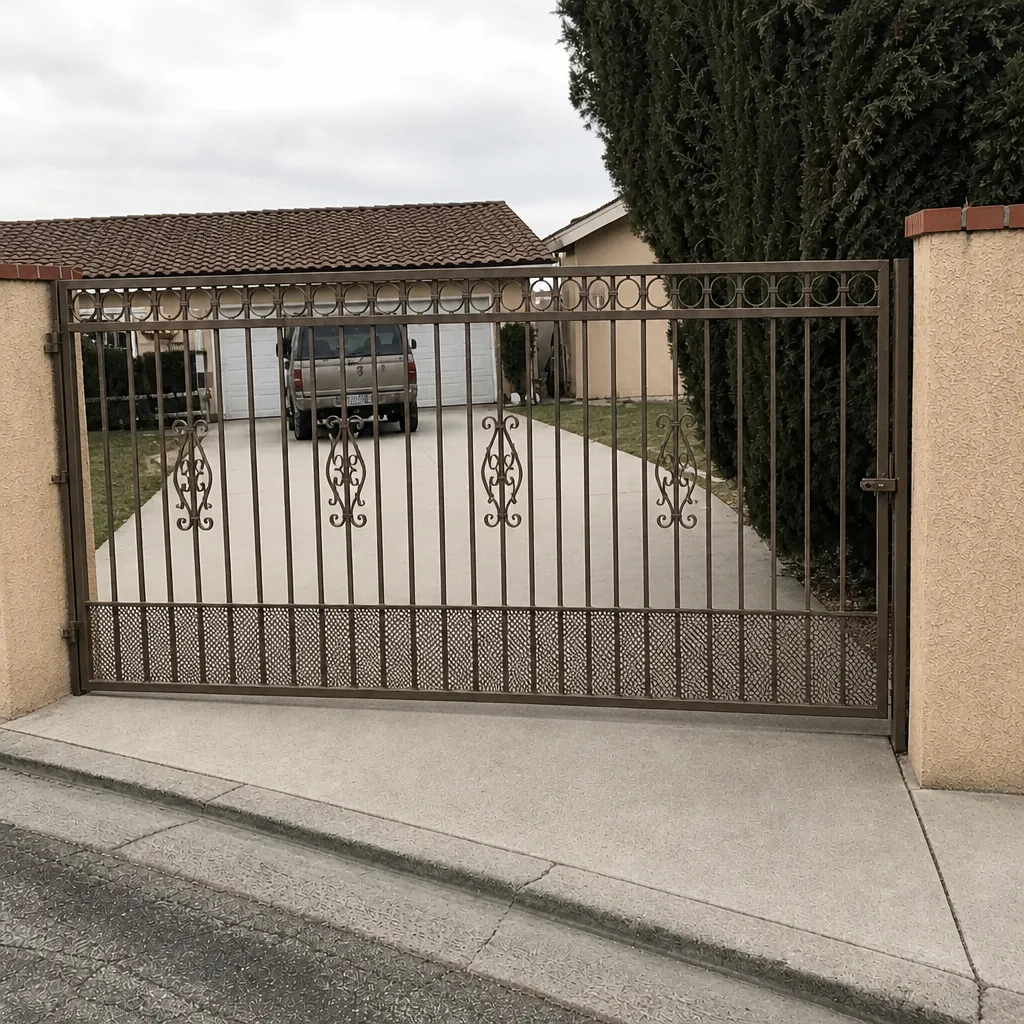 After
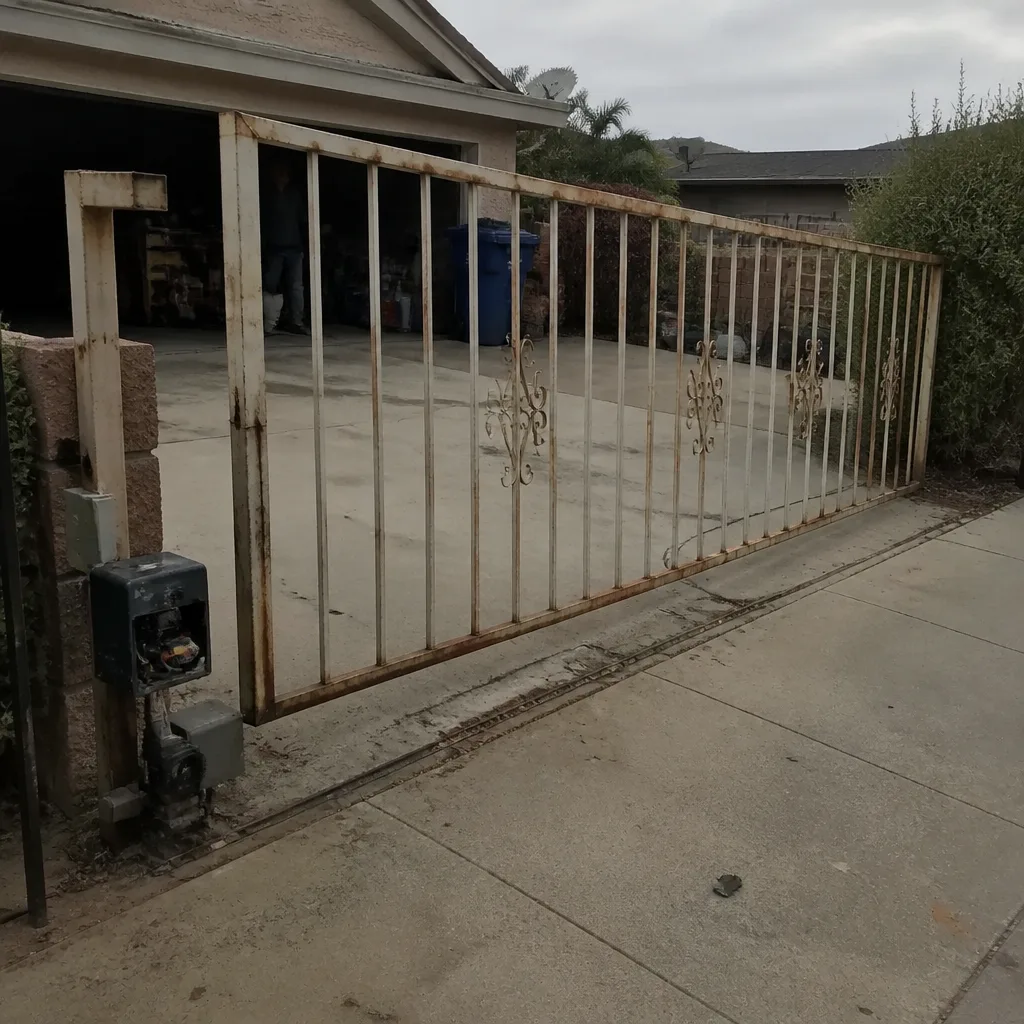 Before
 After
 Before
 After
When to Call a Professional
Call a technician when the symptom points to the control board, the motor, the safety wiring, or a structural component. Call sooner if the gate is dragging, sparking, slamming, or failing a safety test – those are stop-operating symptoms, not repair-at-your-convenience symptoms. Call when you’ve cleaned the photo-eyes and replaced the remote battery and nothing changed. And call when you’re not sure. Diagnosing electrical faults on a gate operator without a meter and the wiring diagram is guesswork, and a wrong guess on a control board is expensive.
Gate Repair Santa Maria offers free estimates in Santa Maria. Our technicians have up to 9 years of experience and work on the major brands – Viking, Ghost Controls, DoorKing, and Elite among them – so the diagnosis starts from a known system, not from scratch. Call (844) 834-0978. We answer 24/7. Fast dispatch from 7am to 7pm, Sunday through Friday.
Frequently Asked Questions
Gate repair in Santa Maria is priced per job by a written estimate, so the cost depends on what’s actually failed – a safety sensor replacement and a control board replacement are different jobs with different price ranges. We give a free estimate and the price is agreed before any work starts, so there’s no surprise invoice at the end. Call (844) 834-0978 for an exact quote. Estimates are free.
In most cases, yes. Fast dispatch runs 7am-7pm, Sunday through Friday. If you call outside dispatch hours, we’ll book you into the next opening. If your gate is sparking or slamming, stop using the automatic function and use the manual release until we arrive. Call (844) 834-0978. We answer 24/7.
Almost never. A gate that opens fine but won’t close is usually a safety device problem: dirty or misaligned photo-eyes, a safety loop picking up metal, or a limit switch that hasn’t registered the gate as fully open. Clean the photo-eye lenses first, check alignment, and clear the loop area. If that doesn’t solve it, the failed safety device needs to be replaced, not the motor. Call (844) 834-0978 and we’ll diagnose the exact cause.
We work on nine major brands – LiftMaster, FAAC, BFT, Linear, Viking, Ghost Controls, DoorKing, Elite, and Mighty Mule – covering residential swing and slide gates as well as commercial access systems. That range means we can start the diagnosis from a known system on your operator rather than learning it on the job. Call (844) 834-0978 for service on your brand.
A gate that stops at the same point every time usually has a limit switch out of adjustment or a mechanical bind the operator can’t push through. If the motor sounds strained just before the stop, it’s a bind. If the motor sounds normal, it’s a limit switch. A gate that stops at random points points to a control board or wiring fault. Any of the three needs a technician with a meter to confirm. Call (844) 834-0978 for a free estimate.
It depends on what’s failed and what the surrounding hardware looks like. A single failed component on an otherwise healthy operator is almost always worth repairing. A motor that’s already caused secondary wear, combined with gate hardware that’s also failing, can tip toward replacement. We cover both repair and full installation, so if the repair reveals a gate that’s near the end of its life, the same team handles the new install. You won’t need a second contractor. Call (844) 834-0978 and we’ll give you a straight read on both options before any work starts.
The Bottom Line
Your gate’s symptom is a clue, and the same pattern shows up across every brand we work on. A clean stop at a consistent point is a limit switch. A strained stop is a motor under load. A gate that opens but won’t close is a safety device. A grinding noise that lives inside the operator housing is a worn drive gear that will become a motor replacement if it’s ignored. A remote that only works up close is a battery or an antenna, not a receiver. Fixing the right thing the first time comes down to matching the symptom to the cause before anyone touches a tool. If you’re not sure which pattern you’re looking at, that’s the point to call – a free estimate and a technician who knows your brand beats a guess every time.
Call (844) 834-0978 for a free estimate on Gate Repair Santa Maria. We answer 24/7. Fast dispatch from 7am to 7pm, Sunday through Friday, serving homeowners and property managers across Santa Maria.
Written by the team at Gate Repair Santa Maria.